
今回はXamarin.Forms(ざまりんふぉーむず)で簡単なアプリを作成してみます。
Xamarin.Forms(ザマリンフォームズ)でiphoneだろうがアンドロイドだろうが対応する
携帯っておおまかに2種類ありますよね?iphoneとアンドロイド。通常iphoneのアプリを開発する場合はswiftというプログラミング言語。アンドロイドのアプリを開発する場合はjavaなどを使用します。つまり、iOS、andoridの両方に対応したアプリを開発する場合、それぞれに対応した言語でプログラムを作成しなければならないと言うことになります。
同じアプリを作るのにswiftとjavaでプログラムを書き直さなければならないと言うのは非常に面倒で手間がかかりますよね?
しかし、Xamarin.Formを利用することでiOSやAndroidのOSの異なる環境でも共通のコードアプリを作成することが可能になります。
まずは動作確認!Xamarin.Formでビルドしてみる
環境構築ですが、MicrosoftからVisualStudio(ビジュアルスタジオ)をダウンロードしてインストールする必要があります。
なお、iOSやAndroid用にビルドするためにXcode、androidStudioが必要になりますのでそちらもダウンロードインストールをしておいてください。インストールが完了したらXamarin.Formで空白のフォームアプリを選択します。
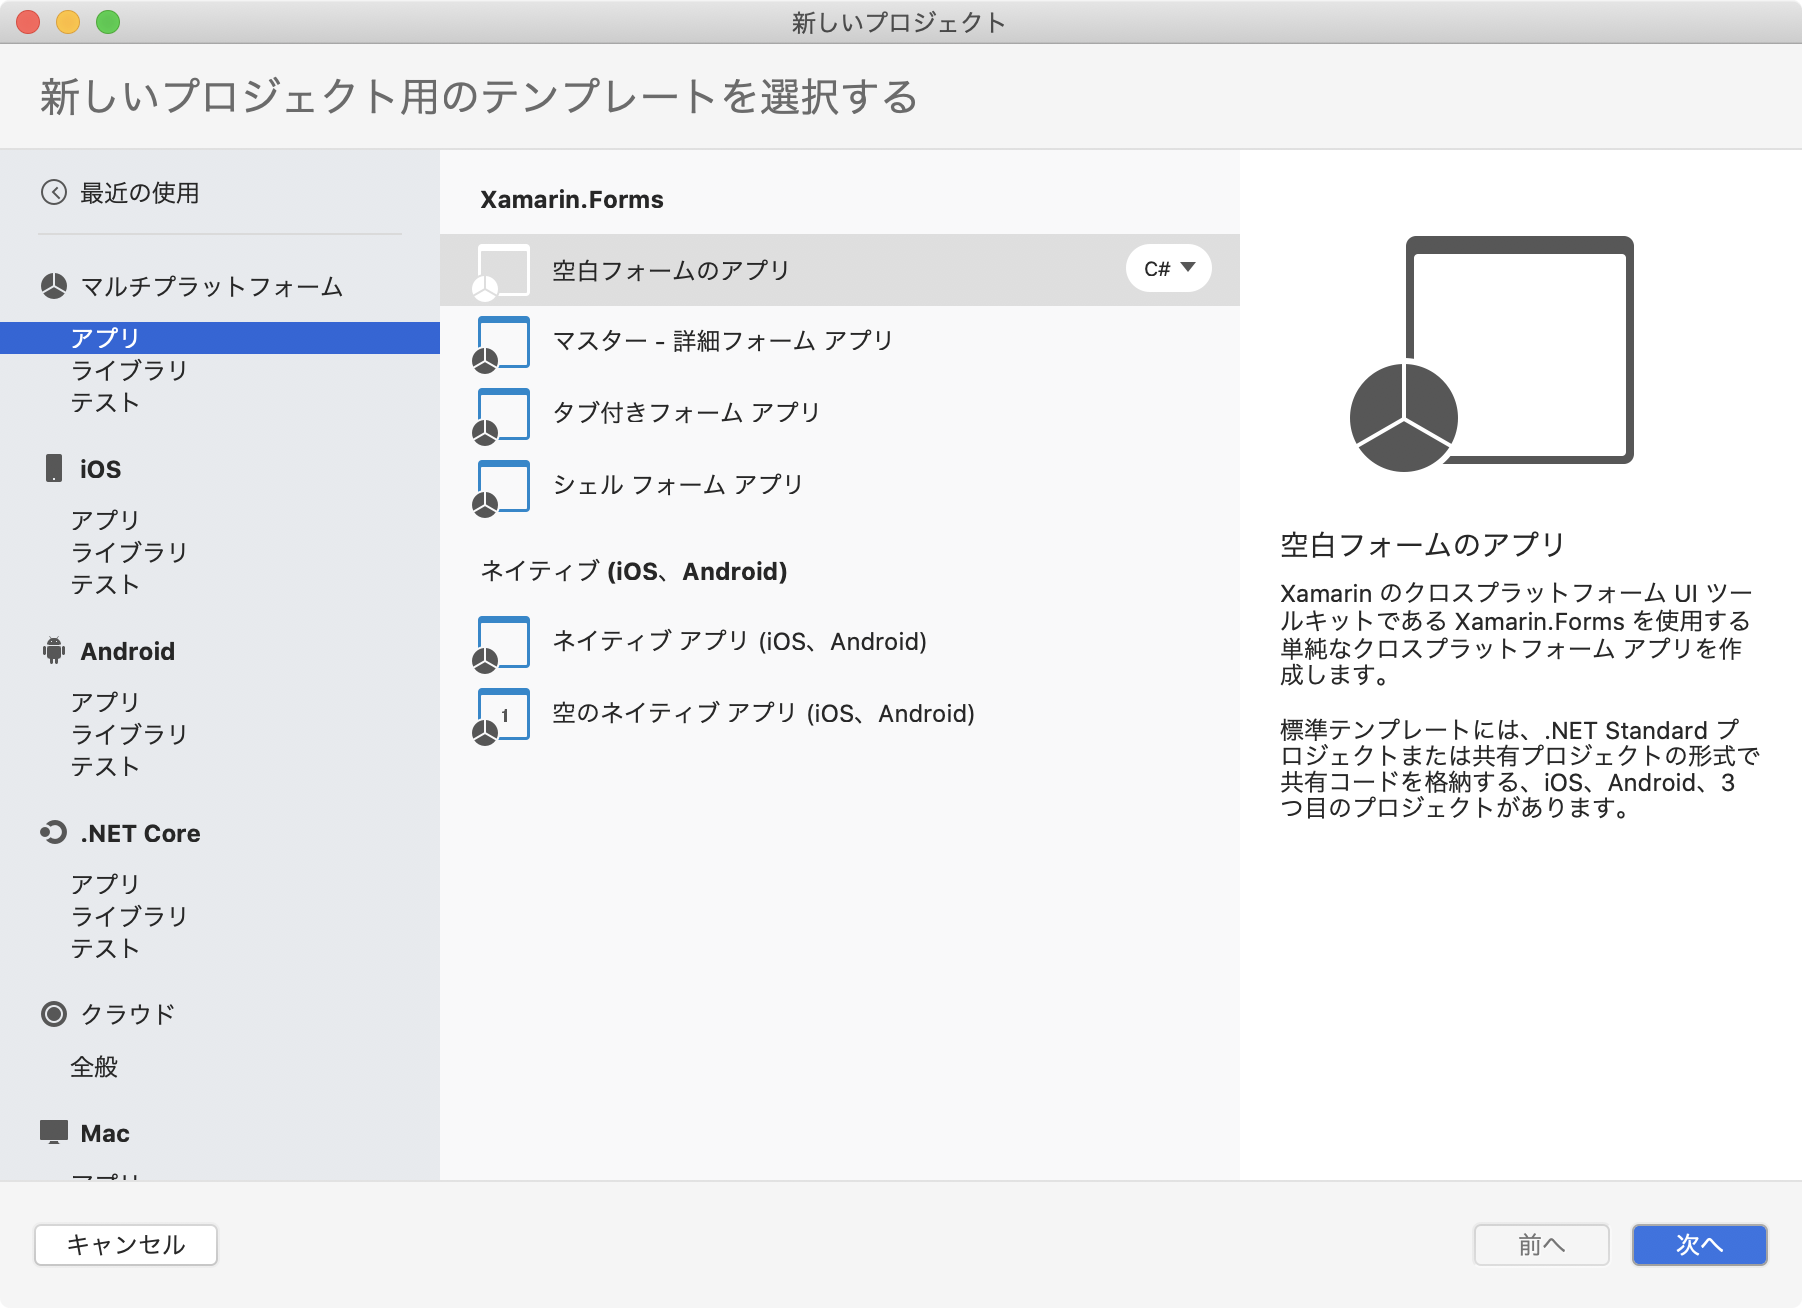
選択が完了したらアプリの名前を入力し、次へをクリックします。

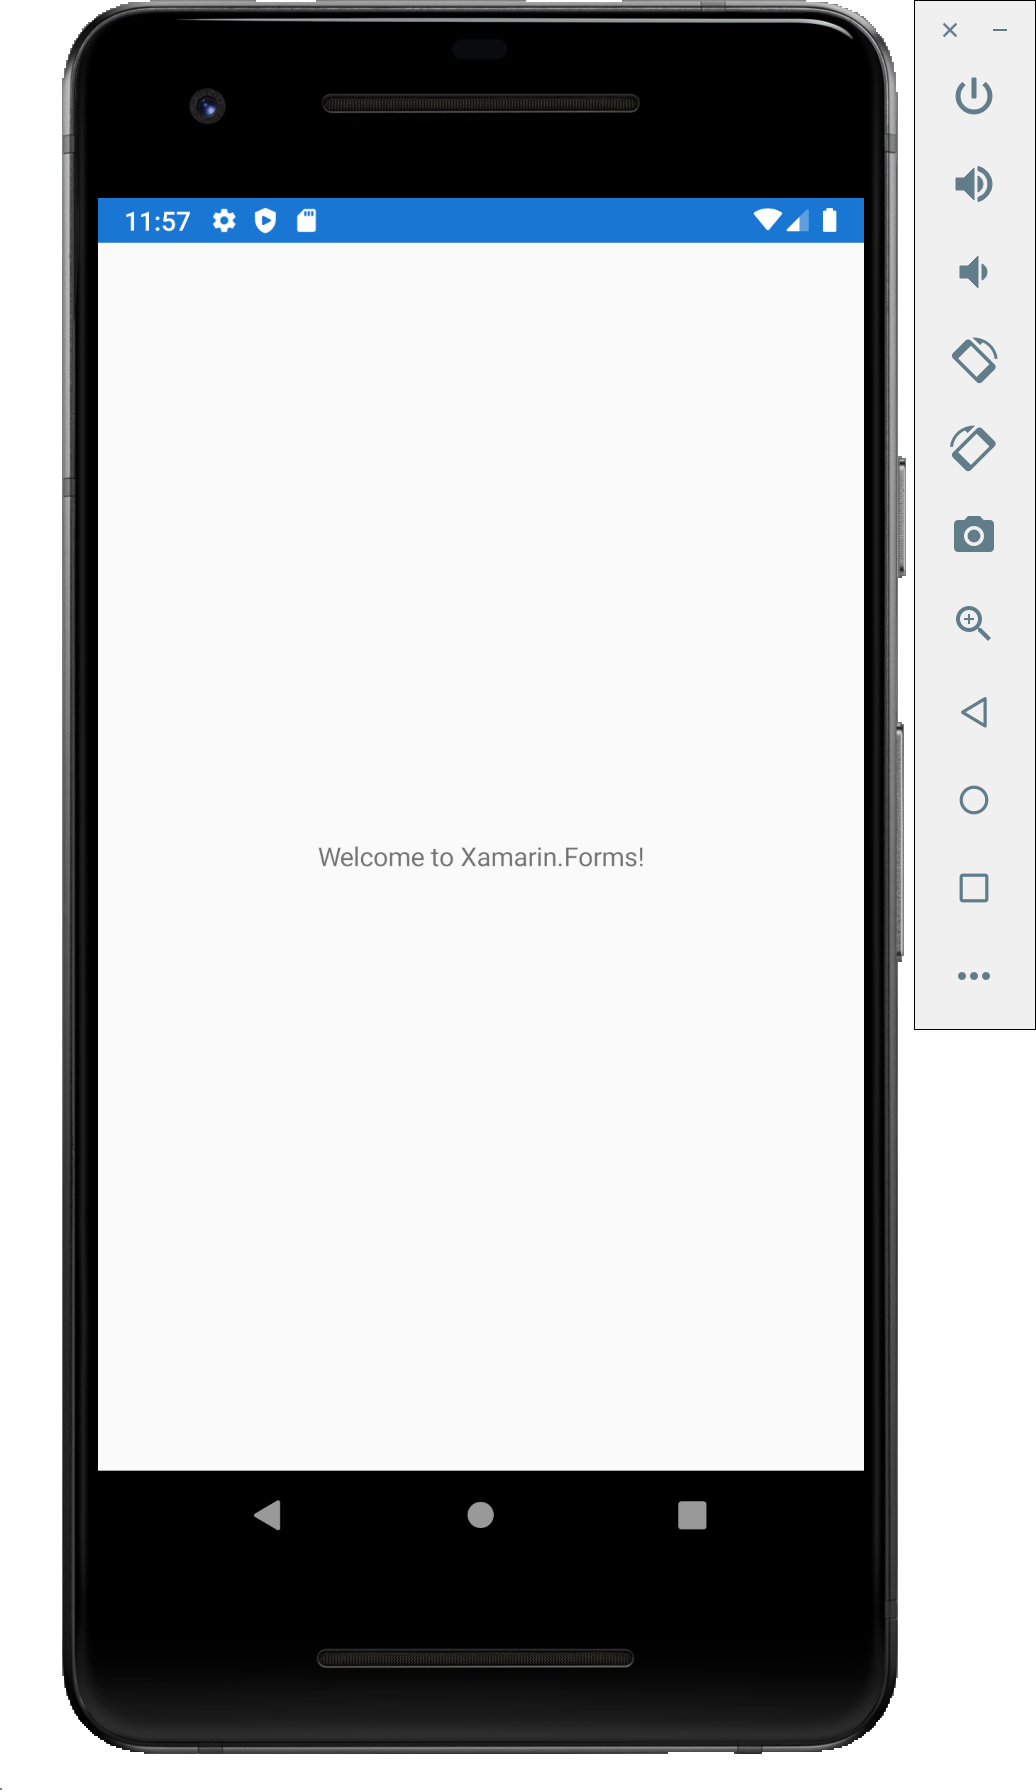
その後、コードが入力できる画面が表示されるので左上の再生ボタンを押すとシュミレータが起動します。
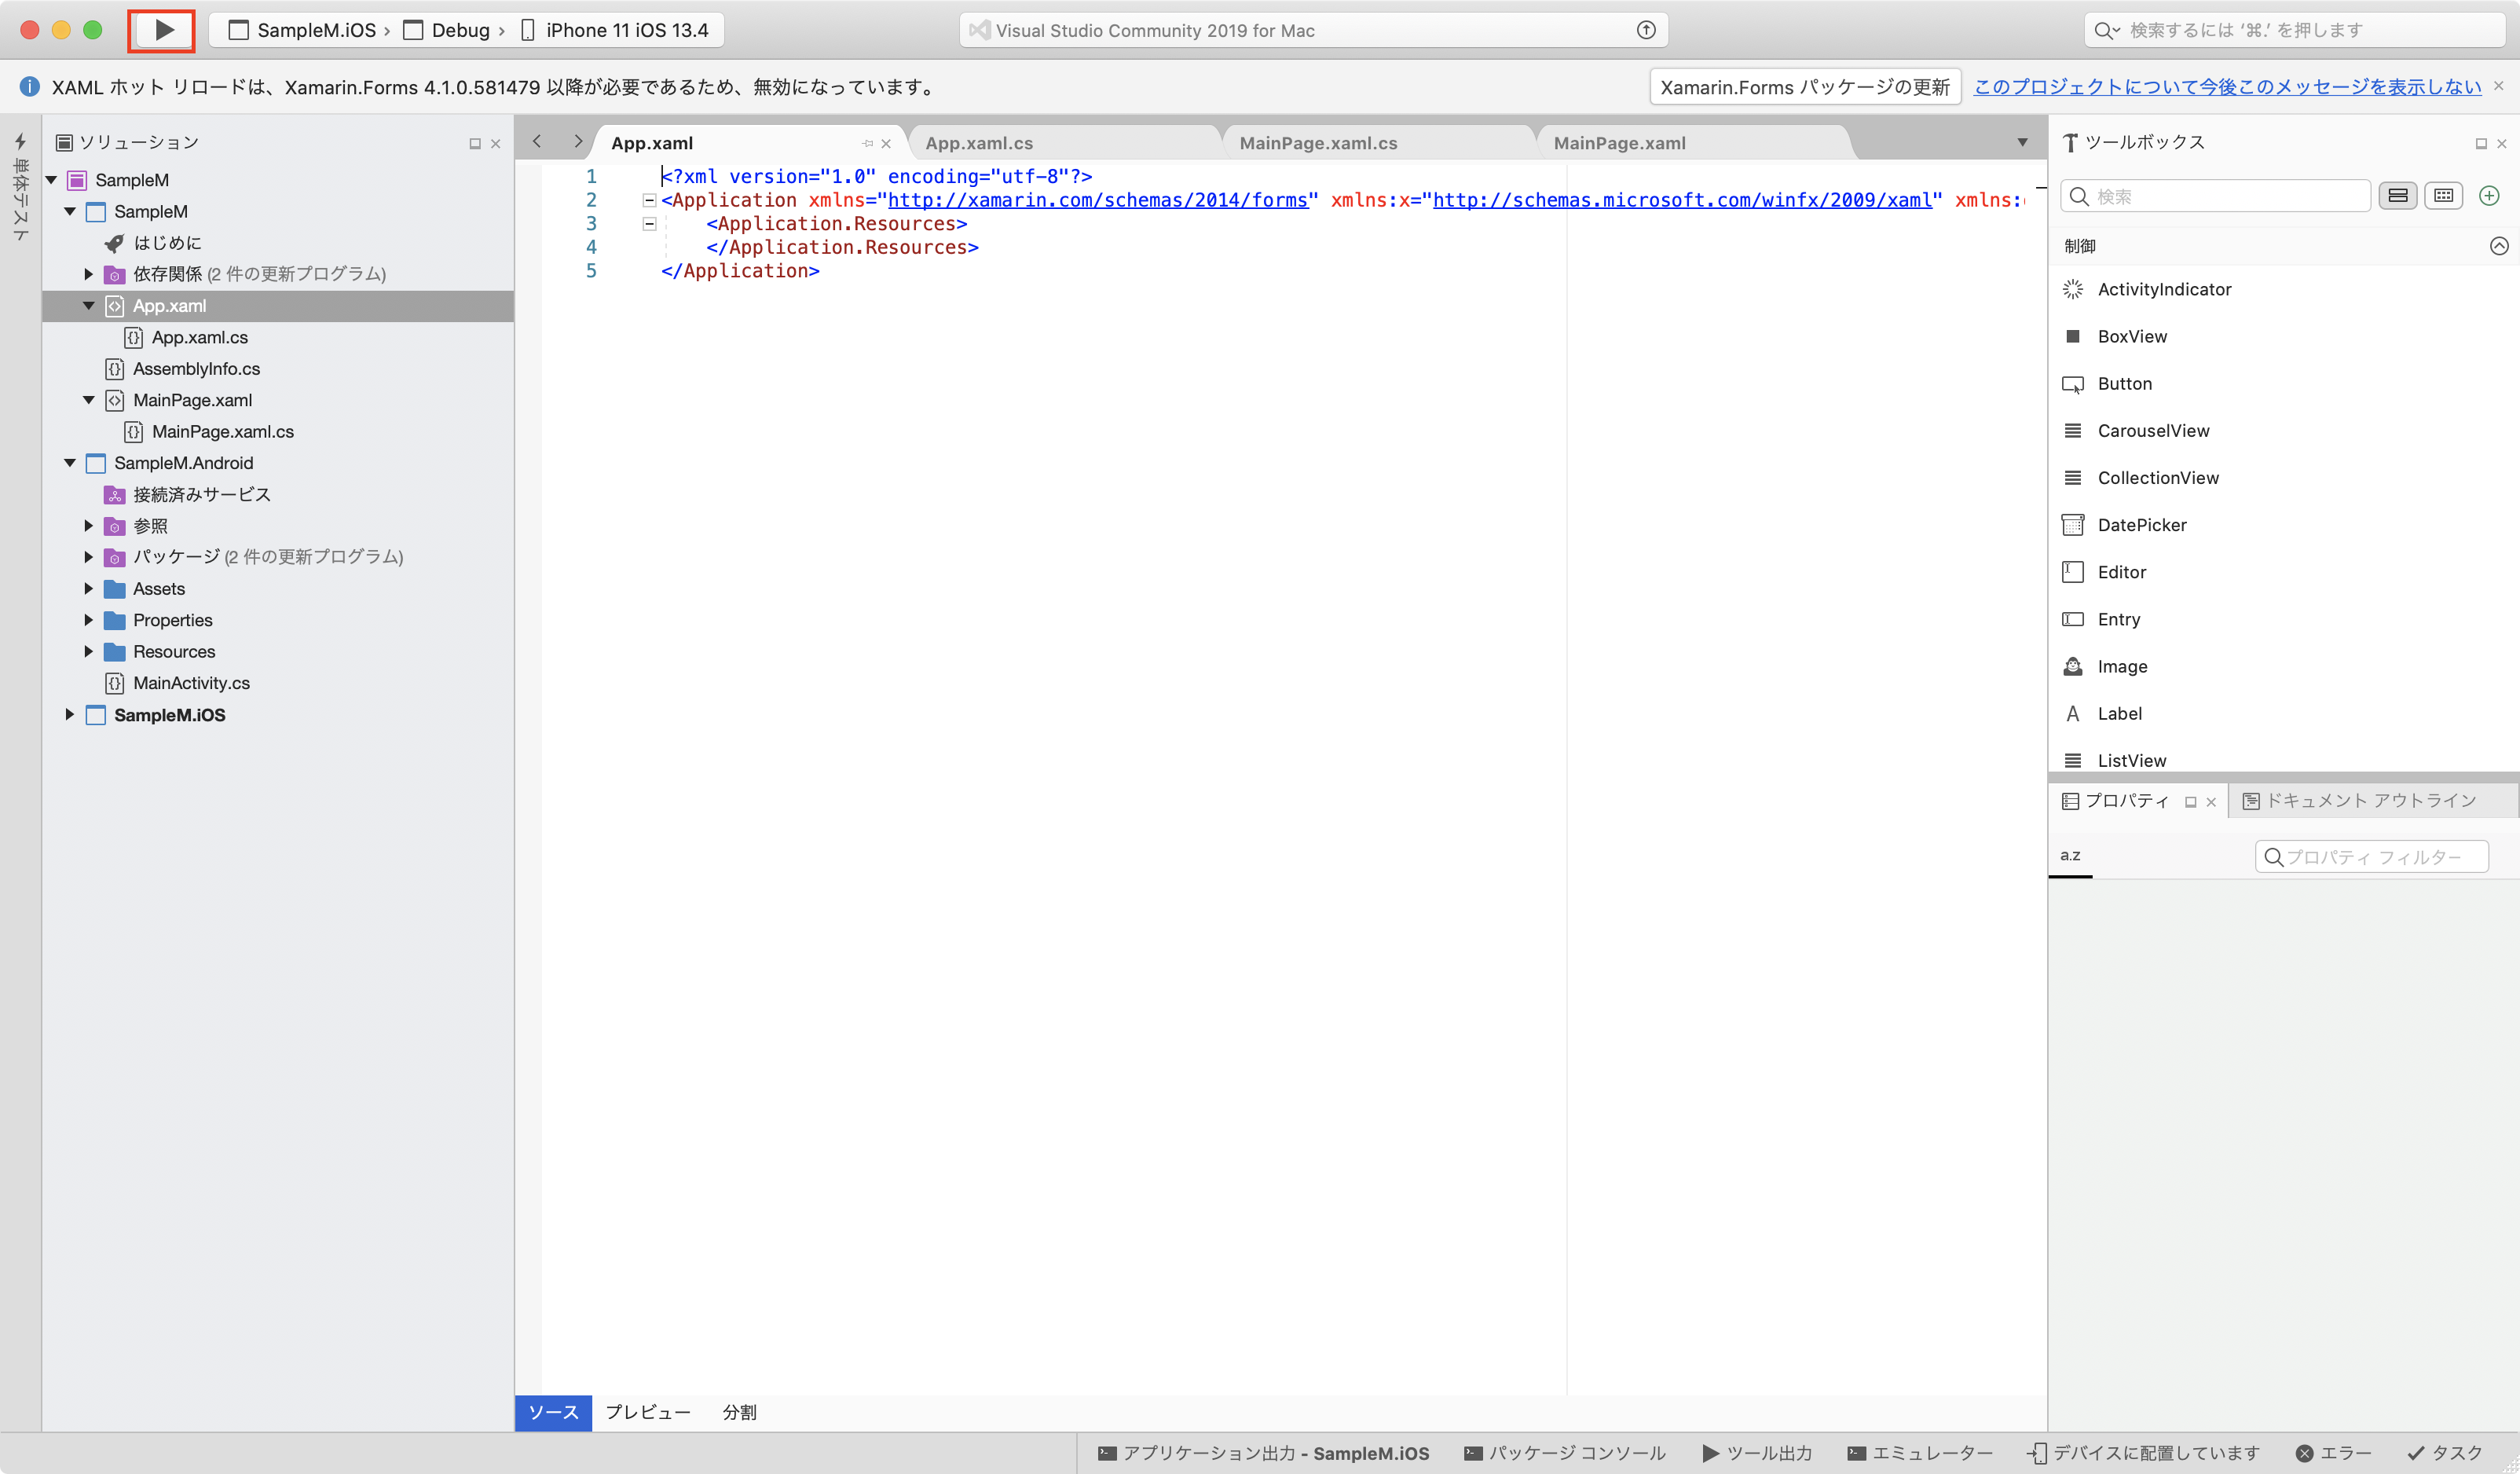
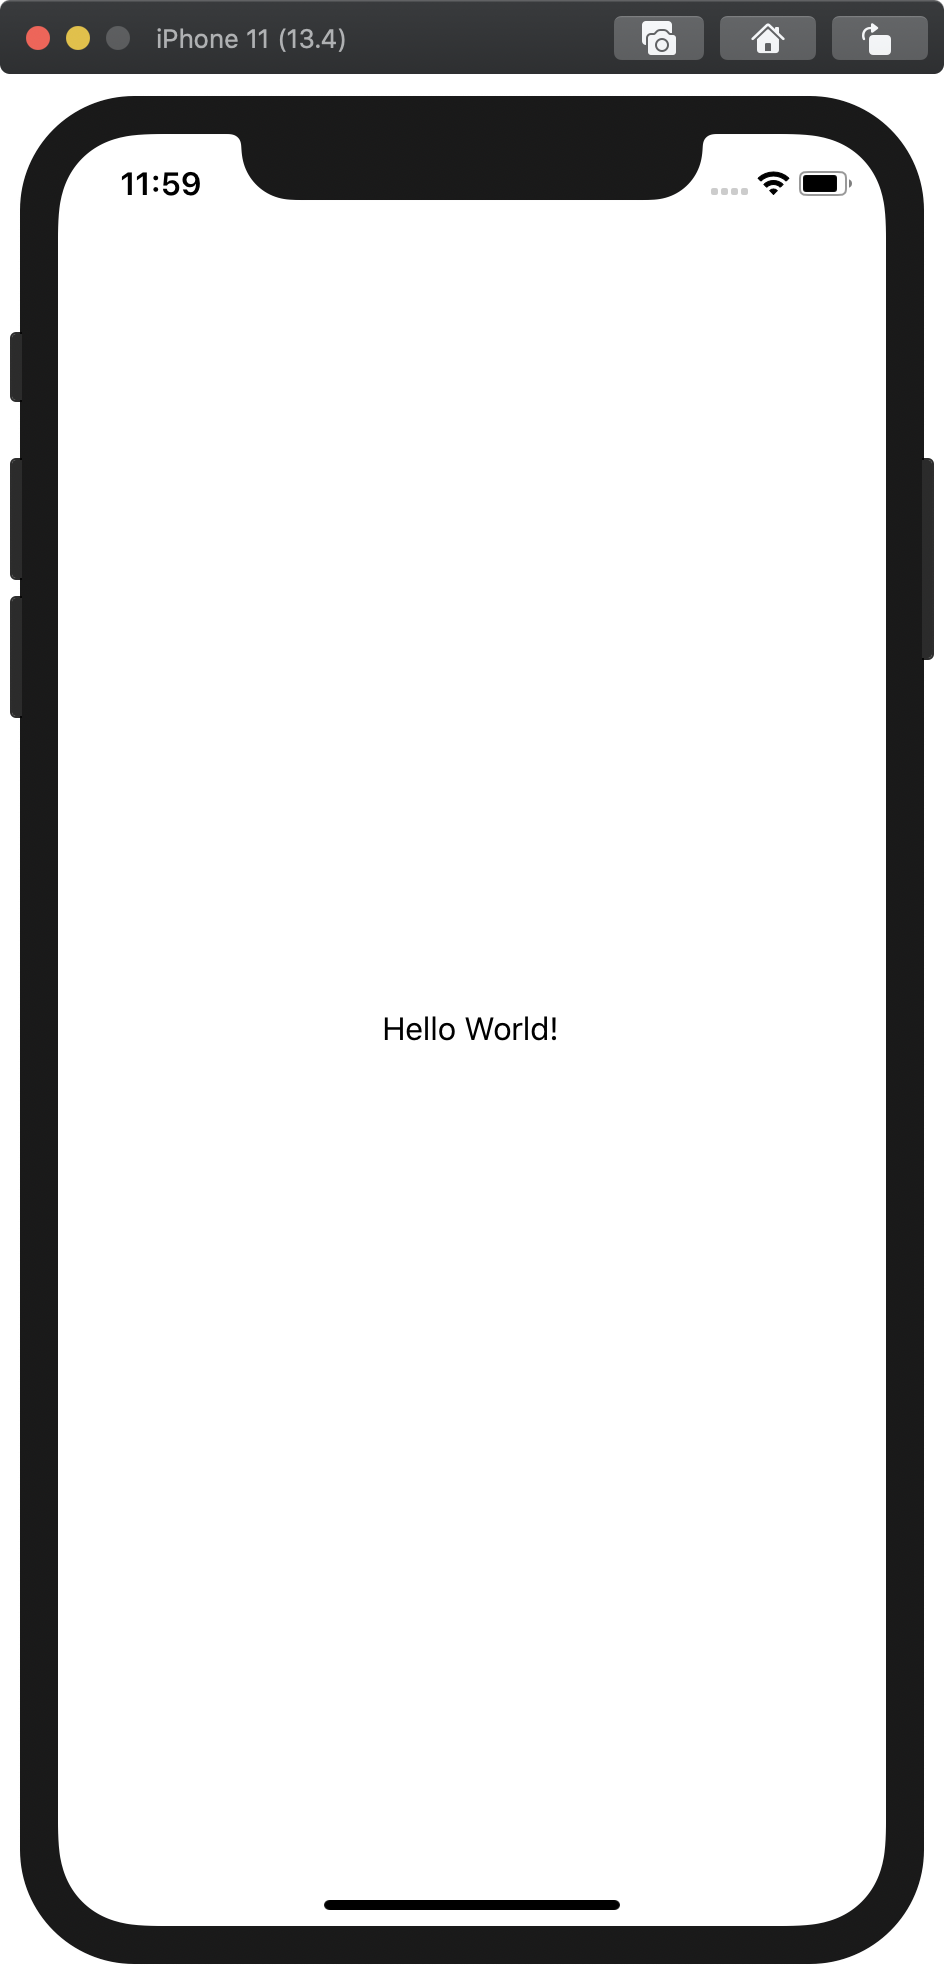
こんな感じです。
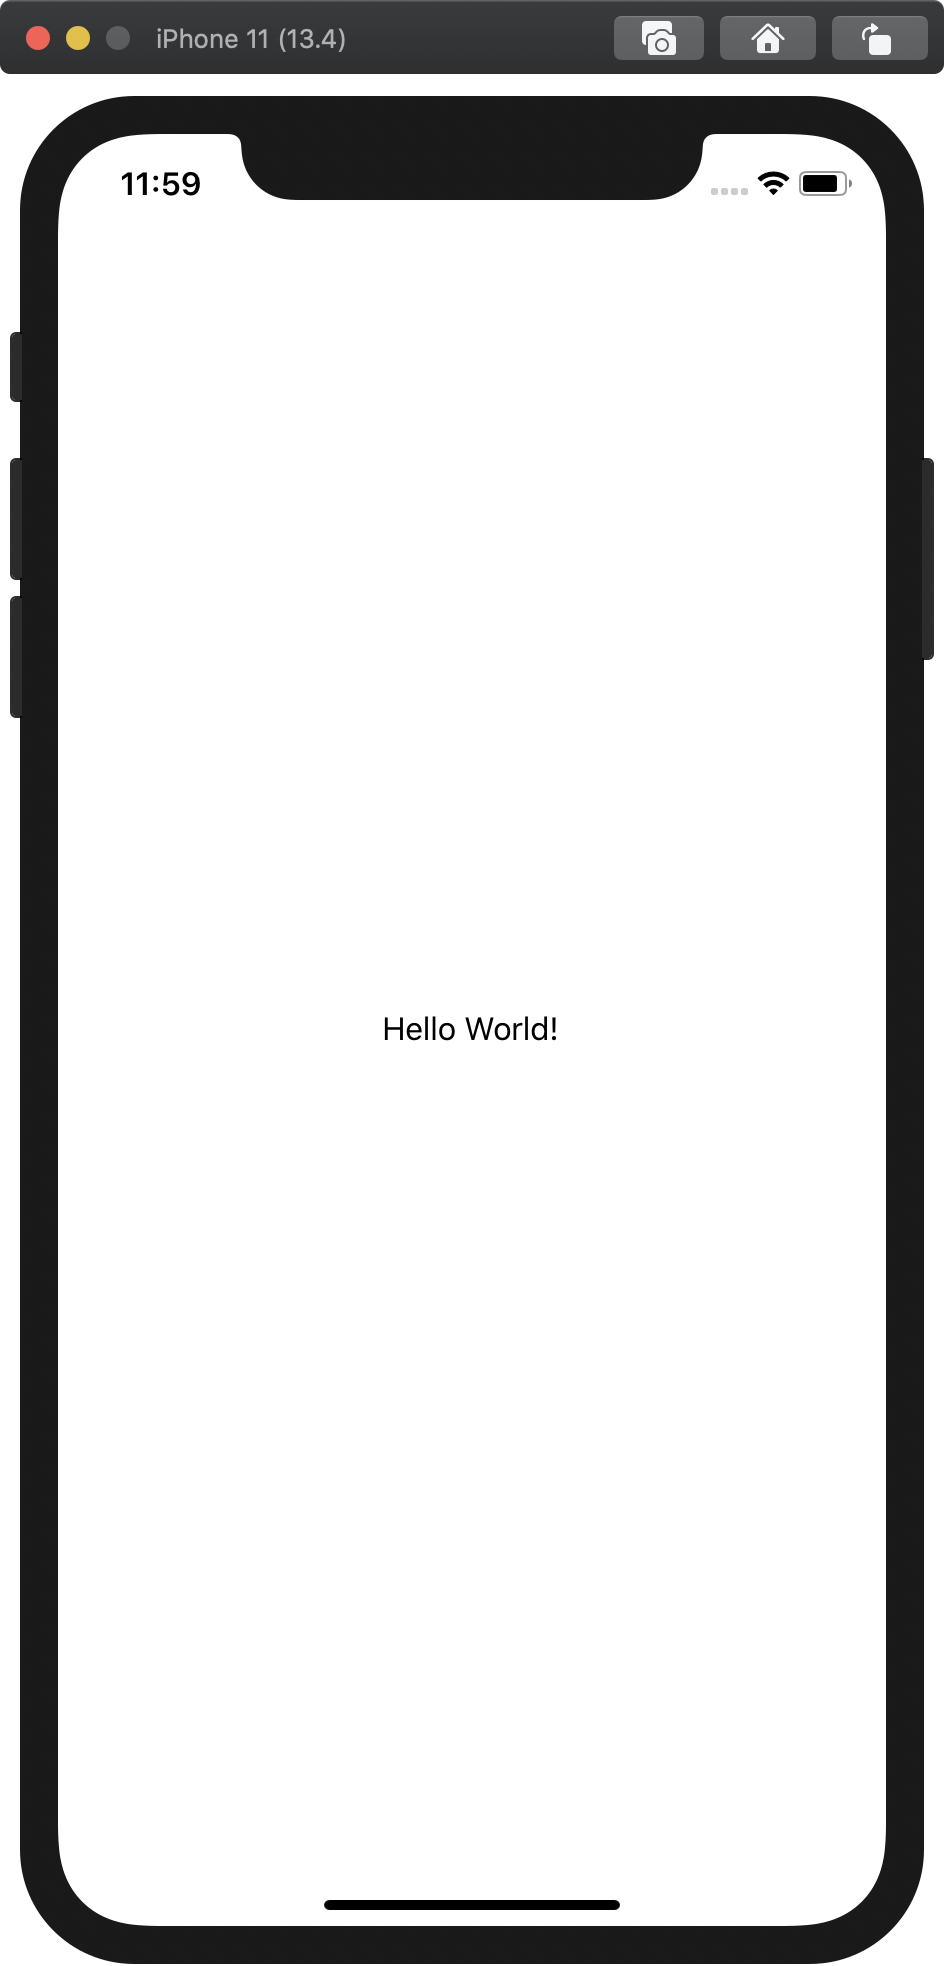
もちろんクラスプラットフォームなので、androidでも同じように表示されます!
Xamarin.FormsでHelloWorldを表示する!
それではおきまりのHelloWorldを実行してみます。
Xamarin.Formは画面のUIを定義するxaml(ザムル)とC#(シーシャープ)のファイルを記述することでアプリを作成することができます。
空白のフォームアプリを作成したとき、アプリを起動するとApp.xaml.csからMainPageが
ロードされる仕組みになっていますね。(13行目)
App.xaml.cs
|
1 2 3 4 5 6 7 8 9 10 11 12 13 14 15 16 17 18 19 20 21 22 23 24 25 26 27 28 |
using System; using Xamarin.Forms; using Xamarin.Forms.Xaml; namespace SampleM { public partial class App : Application { public App() { InitializeComponent(); MainPage = new MainPage(); } protected override void OnStart() { } protected override void OnSleep() { } protected override void OnResume() { } } } |
それではMainPageのUI側、MainPage.xamlを見てみます。
5行目あたりに「Welcome to Xamarin.Forms!」と書かれていることがわかります。
このlabelが画面に文字を表示している部分となります。
この文字を”Hello World!”に変更して実行すると画面上に「HelloWorld!」と
表示されます。
|
1 2 3 4 5 6 7 |
<?xml version="1.0" encoding="utf-8"?> <ContentPage xmlns="http://xamarin.com/schemas/2014/forms" xmlns:x="http://schemas.microsoft.com/winfx/2009/xaml" xmlns:d="http://xamarin.com/schemas/2014/forms/design" xmlns:mc="http://schemas.openxmlformats.org/markup-compatibility/2006" mc:Ignorable="d" x:Class="HelloTest.MainPage"> <StackLayout> <!-- Place new controls here --> <Label Text="Welcome to Xamarin.Forms!" HorizontalOptions="Center" VerticalOptions="CenterAndExpand" /> </StackLayout> </ContentPage> |
Xamarin.Formでボタンを追加して遊んでみる。
文字の表示だけではつまらないので今度はボタンを追加し、ボタンを押したらHelloWorldの文字を
変更するようにしてみましょう。
先ほどと同様にMainPage.xamlにボタンを表示するためのコードを書いていきます。(10行目、12-14行目)
10行目ではLabelの中に「x:Name=”sampleLabel”」というプロパティを追加しています。
このコードを追加した理由は、ボタンを押した時、何処の部品を変更するかプログラムに指示を与えるため
名前が必要になるからです。
「ボタンを押したら[sampleLabel]という文字を変更してね」という処理をプログラムに書いていきます。
続いて12-14行目ですが、ボタンの色等の設定のほかに、「Clicked=”ButtonClick”」という部分があります。
この部分が処理の呼び出しを設定している箇所になります。「ボタンをクリックしたら[ButtonClick]という
機能を実行してください」という意味になります。
MainPage.xaml
|
1 2 3 4 5 6 7 8 9 10 11 12 13 14 15 16 |
<?xml version="1.0" encoding="utf-8"?> <ContentPage xmlns="http://xamarin.com/schemas/2014/forms" xmlns:x="http://schemas.microsoft.com/winfx/2009/xaml" xmlns:d="http://xamarin.com/schemas/2014/forms/design" xmlns:mc="http://schemas.openxmlformats.org/markup-compatibility/2006" mc:Ignorable="d" x:Class="SampleM.MainPage"> <ContentPage.Padding> <OnPlatform x:TypeArguments="Thickness"> <On Platform="iOS">0,40,0,0</On></OnPlatform> </ContentPage.Padding> <StackLayout> <!-- Place new controls here --> <Label Text="Hello World!" x:Name="sampleLabel" HorizontalOptions="Center" /> <!--ボタン追加--> <Button Text="ボタンです!" Clicked="ButtonClick" VerticalOptions="Center" BorderColor="RosyBrown" BorderRadius="30" BorderWidth="2" WidthRequest="60" HeightRequest="60" BackgroundColor="Brown" TextColor="White" /> </StackLayout> </ContentPage> |
これでボタンの表示部分は完了です。
次にこのボタンに機能を割り当てていきます。
機能を追加する場合は、C#にプログラムを書いていきます。
ページ名と同じC#スクリプトが用意されているのでそこに処理を書いていきます。
追加したのは21-24行目です。
ボタンに書いた「Clicked=”ButtonClick”」で書いた通りButtonClick関数を追加しています。
関数の処理内容は「sampleLabel」という部品のTextを「Clickしたね!」にしなさい!
という意味になります。
MainPage.cs
|
1 2 3 4 5 6 7 8 9 10 11 12 13 14 15 16 17 18 19 20 21 22 23 24 25 26 27 |
using System; using System.Collections.Generic; using System.ComponentModel; using System.Linq; using System.Text; using System.Threading.Tasks; using Xamarin.Forms; namespace SampleM { // Learn more about making custom code visible in the Xamarin.Forms previewer // by visiting https://aka.ms/xamarinforms-previewer [DesignTimeVisible(false)] public partial class MainPage : ContentPage { public MainPage() { InitializeComponent(); } private void ButtonClick(object sender, EventArgs args) { this.sampleLabel.Text = "Clickしたね!"; } } } |
ここまでかけたら実行してボタンを押してみましょう。
HelloWorld!の文字が変更されていればOKです。
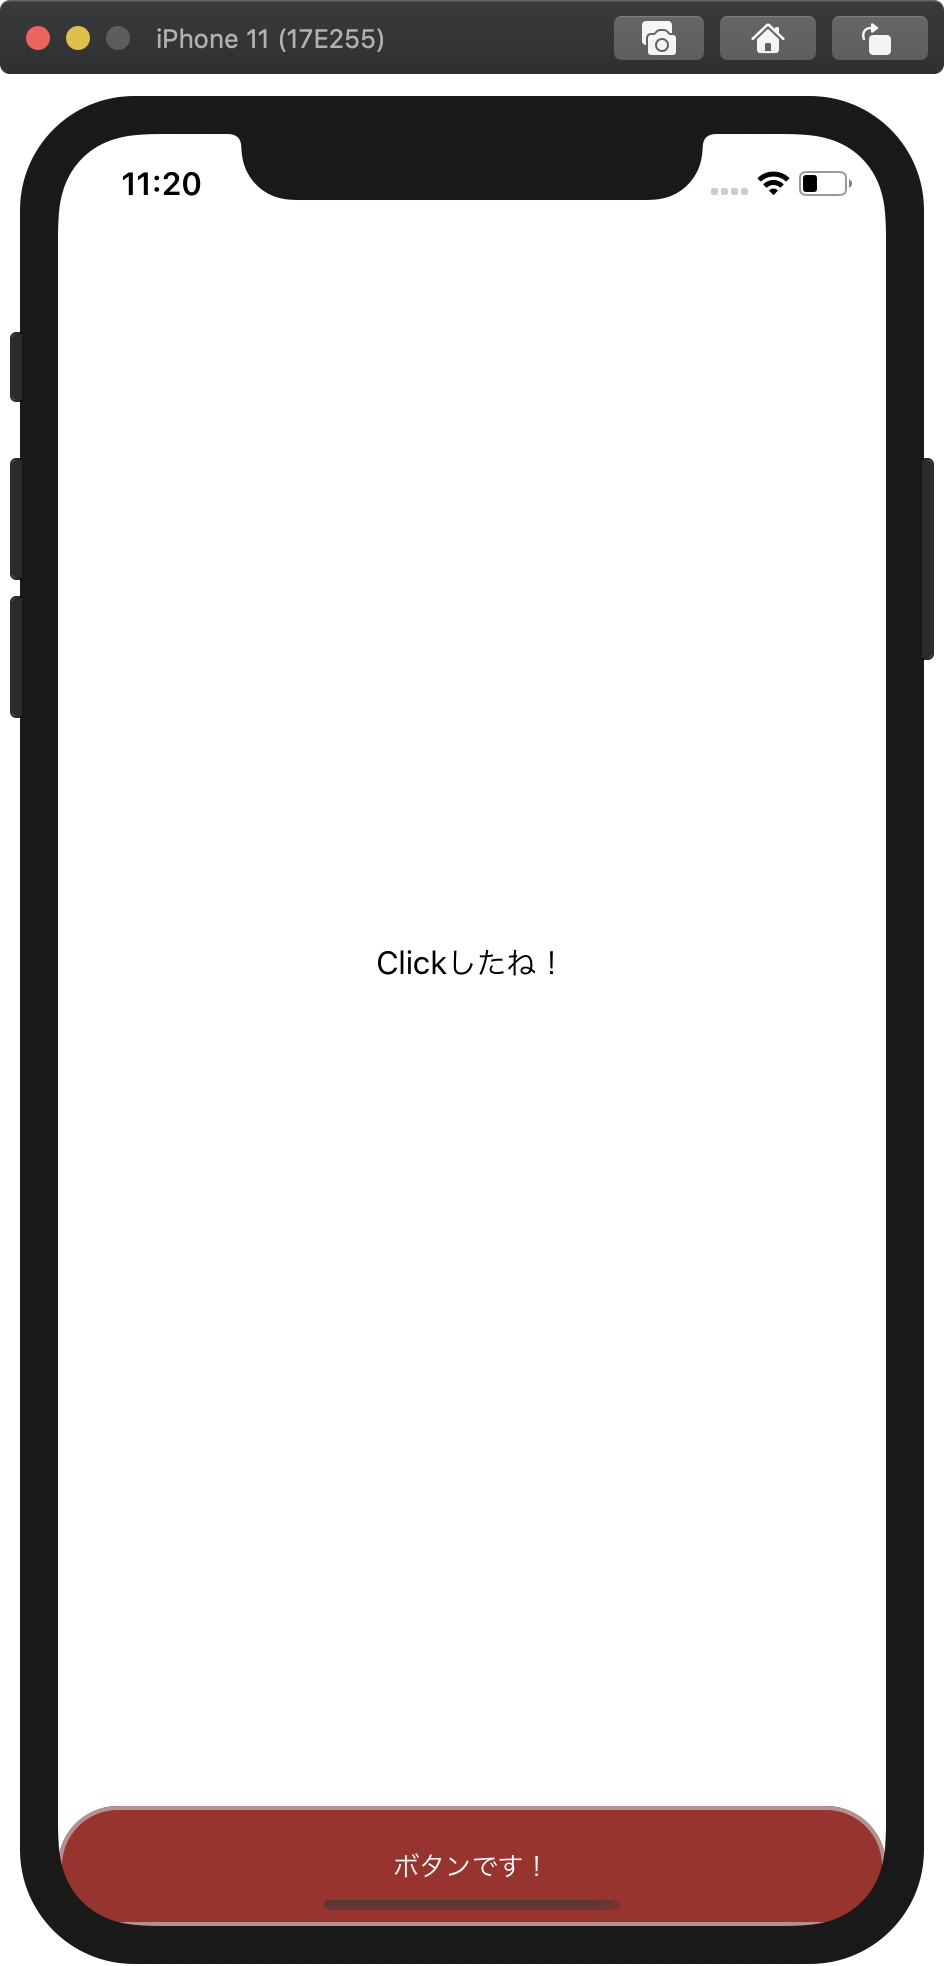
わかります、わかりますよ、ボタンの位置ですよね?。
めっちゃ下ですね。これじゃあタップできないってことですよね。
先ほど書いた通りUIのレイアウトはxamlで決めるので、xamlを修正していきましょう。
xamlのレイアウトの手法について
xamlにはいくつかのレイアウトのコントロール方法があります。
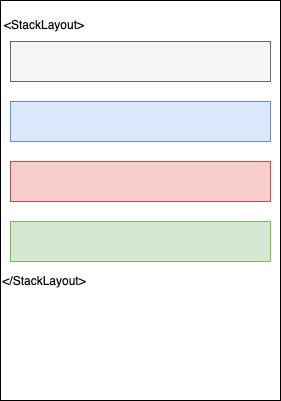
・Stacklayout(スタックレイアウト)
要素をスタックする(積み重ねていく)イメージです。
<StackLayout>の中に書いたパーツは積み重なって並んでいきます。
・Grid(グリッド)
格子状に領域を区切ってその座標で配置していく方法です。
下記の図の場合、緑の部品は 1行目 1番目の列に配置しています。
※一番上が0行、一番左が0列となります。

他にもいろいろありますが、細かい説明はここでは書ききれないため、
で公式のドキュメントを参考にしてください
今回作成したxmalは次のようになっています。
|
1 2 3 4 5 6 7 8 9 10 11 12 |
<?xml version="1.0" encoding="utf-8"?> <ContentPage xmlns="http://xamarin.com/schemas/2014/forms" xmlns:x="http://schemas.microsoft.com/winfx/2009/xaml" xmlns:d="http://xamarin.com/schemas/2014/forms/design" xmlns:mc="http://schemas.openxmlformats.org/markup-compatibility/2006" mc:Ignorable="d" x:Class="HelloTest.MainPage"> <StackLayout> <!-- Place new controls here --> <Label Text="Hello World!" x:Name="sampleLabel" HorizontalOptions="Center" VerticalOptions="CenterAndExpand" /> <!--ボタン追加--> <Button Text="ボタンです!" Clicked="ButtonClick" VerticalOptions="Center" BorderColor="RosyBrown" BorderRadius="30" BorderWidth="2" WidthRequest="60" HeightRequest="60" BackgroundColor="Brown" TextColor="White" /> </StackLayout> </ContentPage> |
3行目に「StackLayout」と書かれているのがわかります。
StackLayoutは重ねていくレイアウト方式のため、5行目に書いたラベル、8行目の
ボタンが重なって表示されます。余白が以上に空いてしまう理由ですが、
5行目のLabelのプロパティ「VerticalOption」に問題があります。
VerticalOptionの設定が「CenterAndExpand」となっています。
CenterAndExpandは「中央に表示し、残りの余白も使用する」設定です。
これではボタンとラベルの間にスペースが空いてしまうのでオプションを
変更しましょう。
中央に表示するには”Center”を利用します。
それではxmalを変更して実行してみましょう。
|
1 2 3 4 5 6 7 8 9 10 11 12 |
<?xml version="1.0" encoding="utf-8"?> <ContentPage xmlns="http://xamarin.com/schemas/2014/forms" xmlns:x="http://schemas.microsoft.com/winfx/2009/xaml" xmlns:d="http://xamarin.com/schemas/2014/forms/design" xmlns:mc="http://schemas.openxmlformats.org/markup-compatibility/2006" mc:Ignorable="d" x:Class="HelloTest.MainPage"> <StackLayout> <!-- Place new controls here --> <Label Text="Hello World!" x:Name="sampleLabel" HorizontalOptions="Center" VerticalOptions="center" /> <!--ボタン追加--> <Button Text="ボタンです!" Clicked="ButtonClick" VerticalOptions="Center" BorderColor="RosyBrown" BorderRadius="30" BorderWidth="2" WidthRequest="60" HeightRequest="60" BackgroundColor="Brown" TextColor="White" /> </StackLayout> </ContentPage> |
どうでしょう!
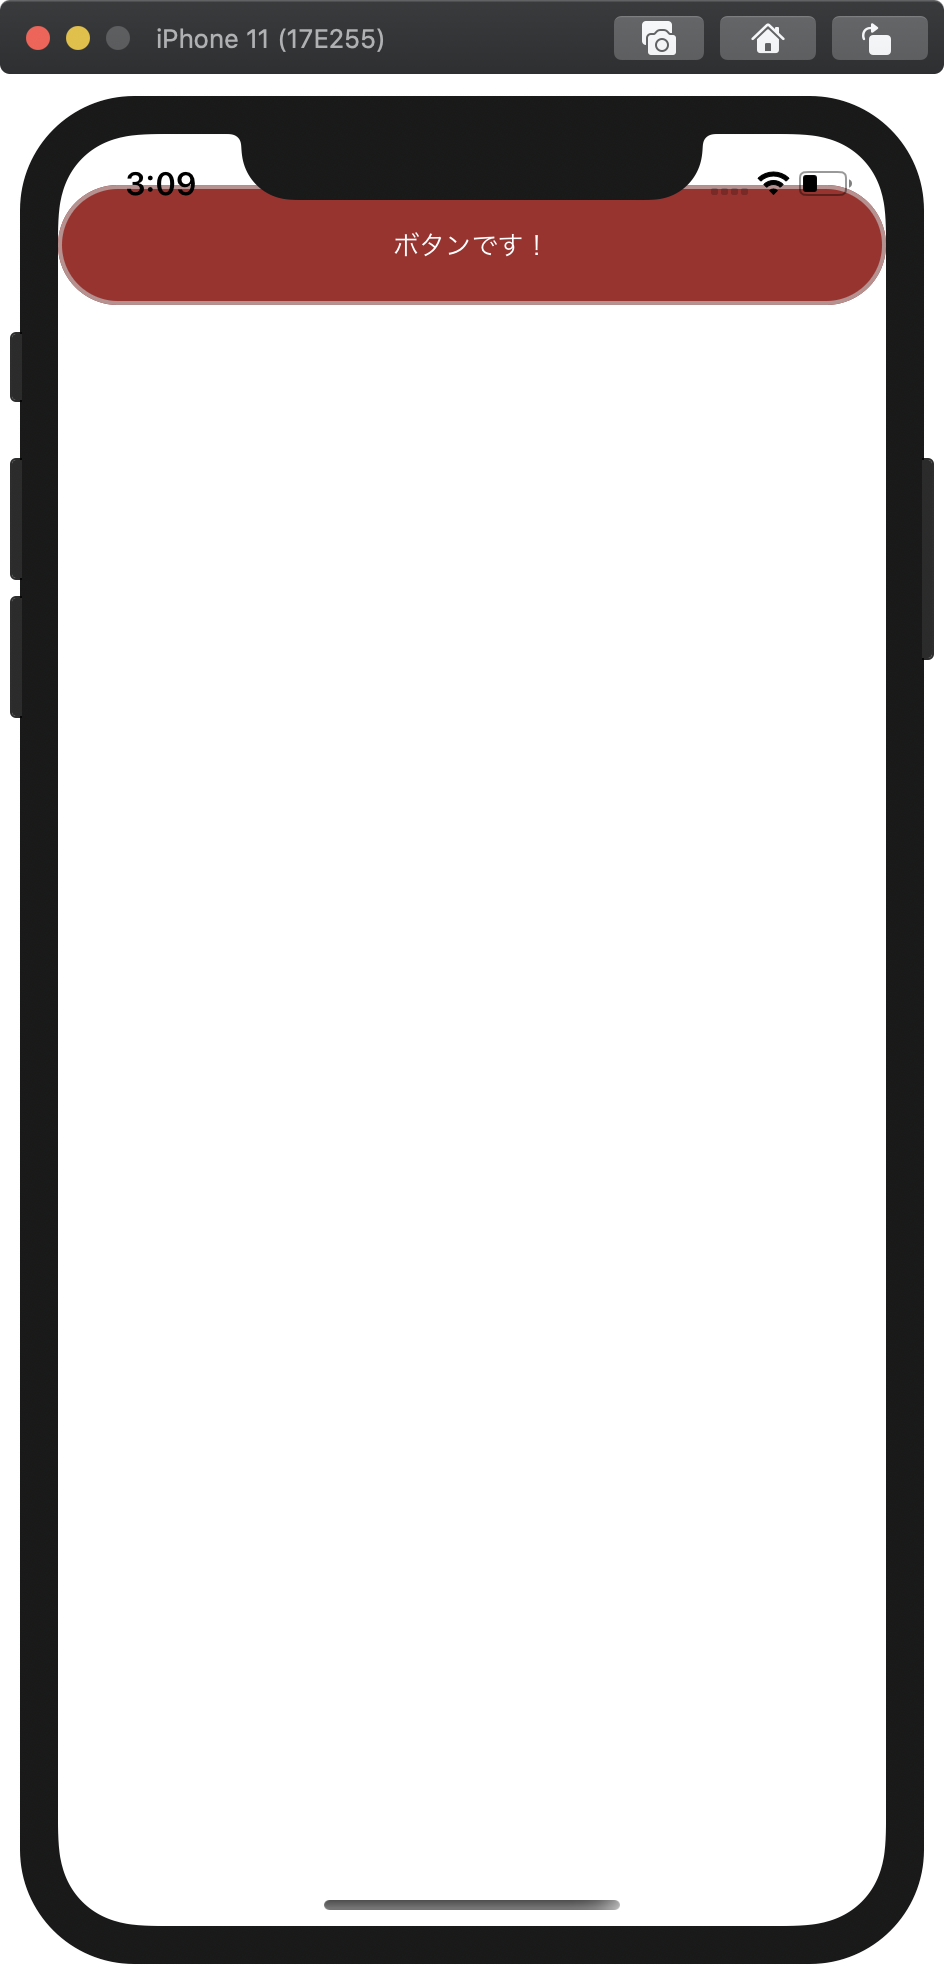
違うんですよね、そうじゃないんですよね。
縦の余白を取らなくなったけど、今度は余白を取らなすぎなんですよね、
じゃあどうする?ってなりますよね、実はスタックレイアウトを多重で利用することが
できるんです。
xmalはこんな感じ!
|
1 2 3 4 5 6 7 8 9 10 11 12 13 14 15 |
<?xml version="1.0" encoding="utf-8"?> <ContentPage xmlns="http://xamarin.com/schemas/2014/forms" xmlns:x="http://schemas.microsoft.com/winfx/2009/xaml" xmlns:d="http://xamarin.com/schemas/2014/forms/design" xmlns:mc="http://schemas.openxmlformats.org/markup-compatibility/2006" mc:Ignorable="d" x:Class="HelloTest.MainPage"> <StackLayout> <StackLayout VerticalOptions="CenterAndExpand"> <!-- Place new controls here --> <Label Text="Hello World!" x:Name="sampleLabel" HorizontalOptions="Center" VerticalOptions="Center" /> <!--ボタン追加--> <Button Text="ボタンです!" Clicked="ButtonClick" VerticalOptions="Center" BorderColor="RosyBrown" BorderRadius="30" BorderWidth="2" WidthRequest="60" HeightRequest="60" BackgroundColor="Brown" TextColor="White" /> </StackLayout> </StackLayout> </ContentPage> |
既存のStackLayoutの中にStackLayoutをさらに追加しています。(5行目)
さらに5行目のStackLayoutに「VerticalOptions=”CenterAndExpand”」を追加して
画面中央に来るようにしています。
結果をみてみましょう!
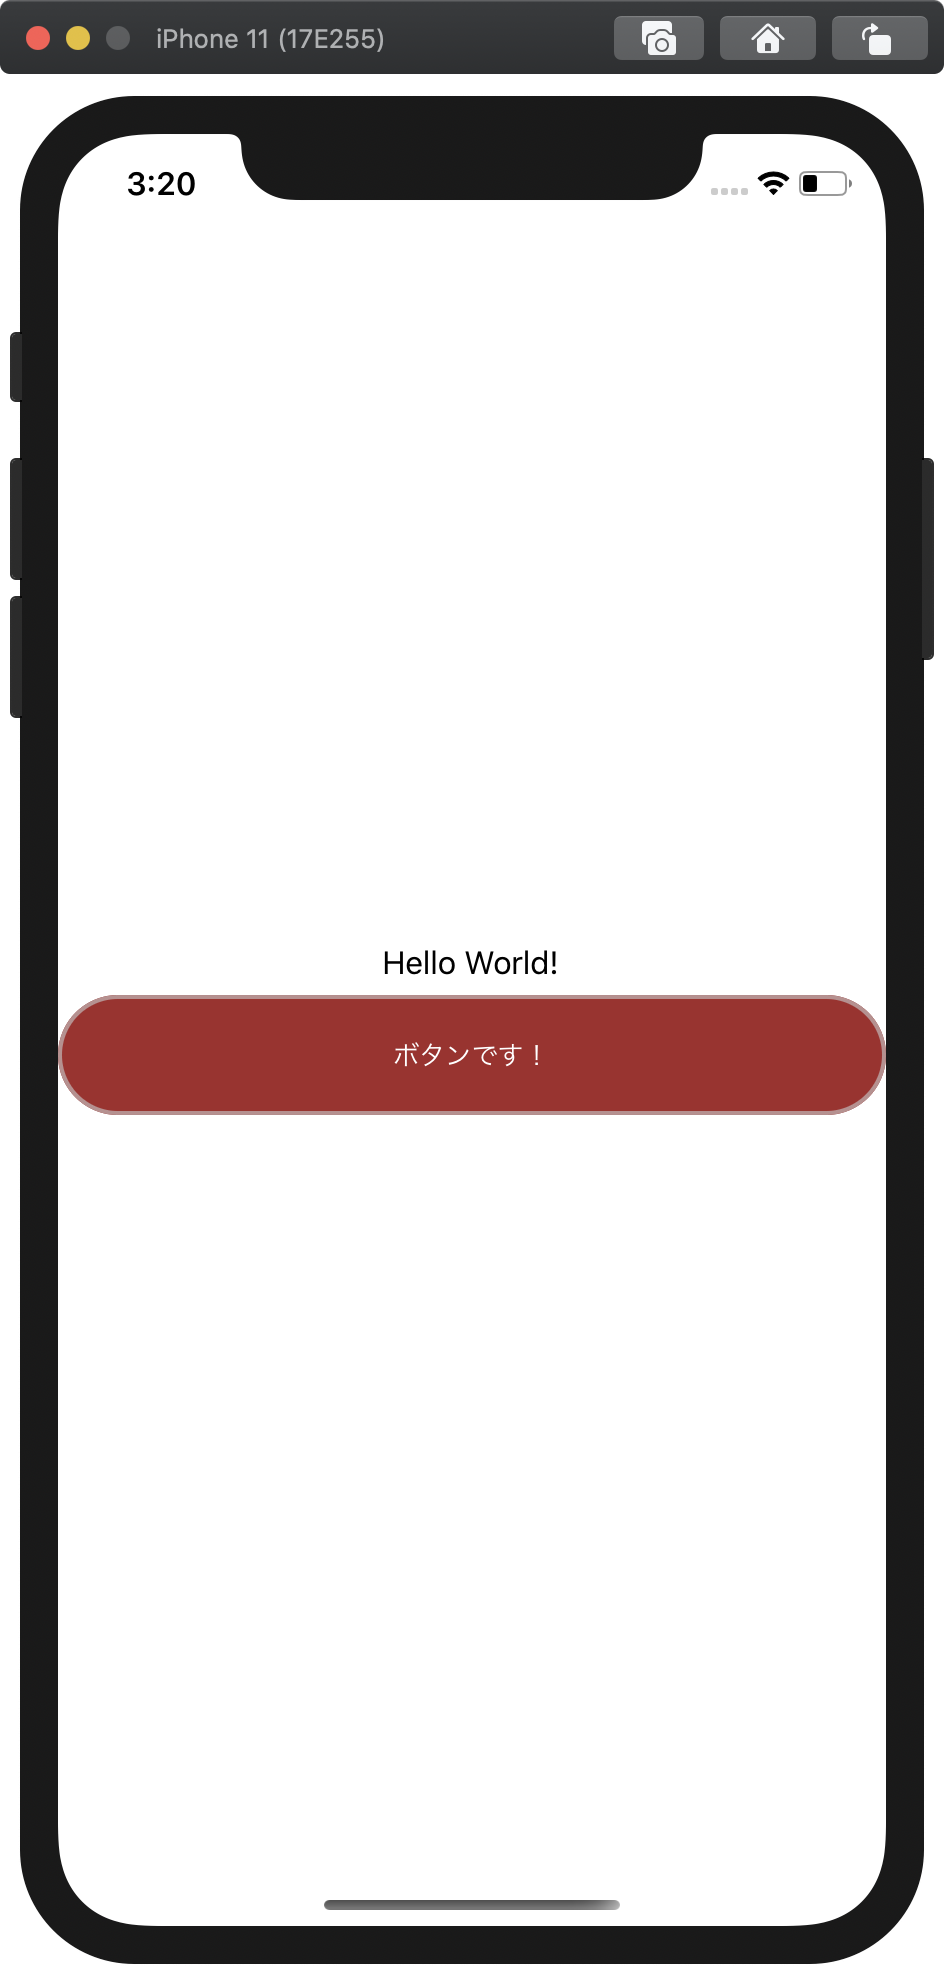
悪くないですね!
あわよくばボタンをちょい小さくしたいですかね!
StackLayoutは横幅いっぱい使ってしまうので、Gridを使って幅を制限します。
|
1 2 3 4 5 6 7 8 9 10 11 12 13 14 15 16 17 18 19 20 21 22 23 |
<?xml version="1.0" encoding="utf-8"?> <ContentPage xmlns="http://xamarin.com/schemas/2014/forms" xmlns:x="http://schemas.microsoft.com/winfx/2009/xaml" xmlns:d="http://xamarin.com/schemas/2014/forms/design" xmlns:mc="http://schemas.openxmlformats.org/markup-compatibility/2006" mc:Ignorable="d" x:Class="HelloTest.MainPage"> <StackLayout> <StackLayout VerticalOptions="CenterAndExpand"> <!-- Place new controls here --> <Label Text="Hello World!" x:Name="sampleLabel" HorizontalOptions="Center" VerticalOptions="Center" /> <!--ボタン追加--> <Grid> <Grid.ColumnDefinitions> <ColumnDefinition Width="33.33*" /> <ColumnDefinition Width="33.33*" /> <ColumnDefinition Width="33.33*" /> </Grid.ColumnDefinitions> <Button Text="ボタンです!" Clicked="ButtonClick" VerticalOptions="Center" BorderColor="RosyBrown" BorderRadius="30" BorderWidth="2" Grid.Column="1" WidthRequest="60" HeightRequest="60" BackgroundColor="Brown" TextColor="White" /> </Grid> </StackLayout> </StackLayout> </ContentPage> |
「HelloWorld!」と書いたLabelの下に Gridを追加しています。(10行目)
11行目から15行目で列の設定をしています。今回は3等分するため、
幅となるwidhを100/3=33.33という値に設定しています。
そして、16行目のボタンに「Grid.Column=”1″」として1列目の範囲にボタンを
表示するようにしています。
構造を簡単な図にするとこんな感じです。
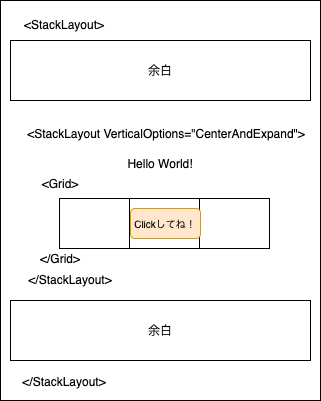
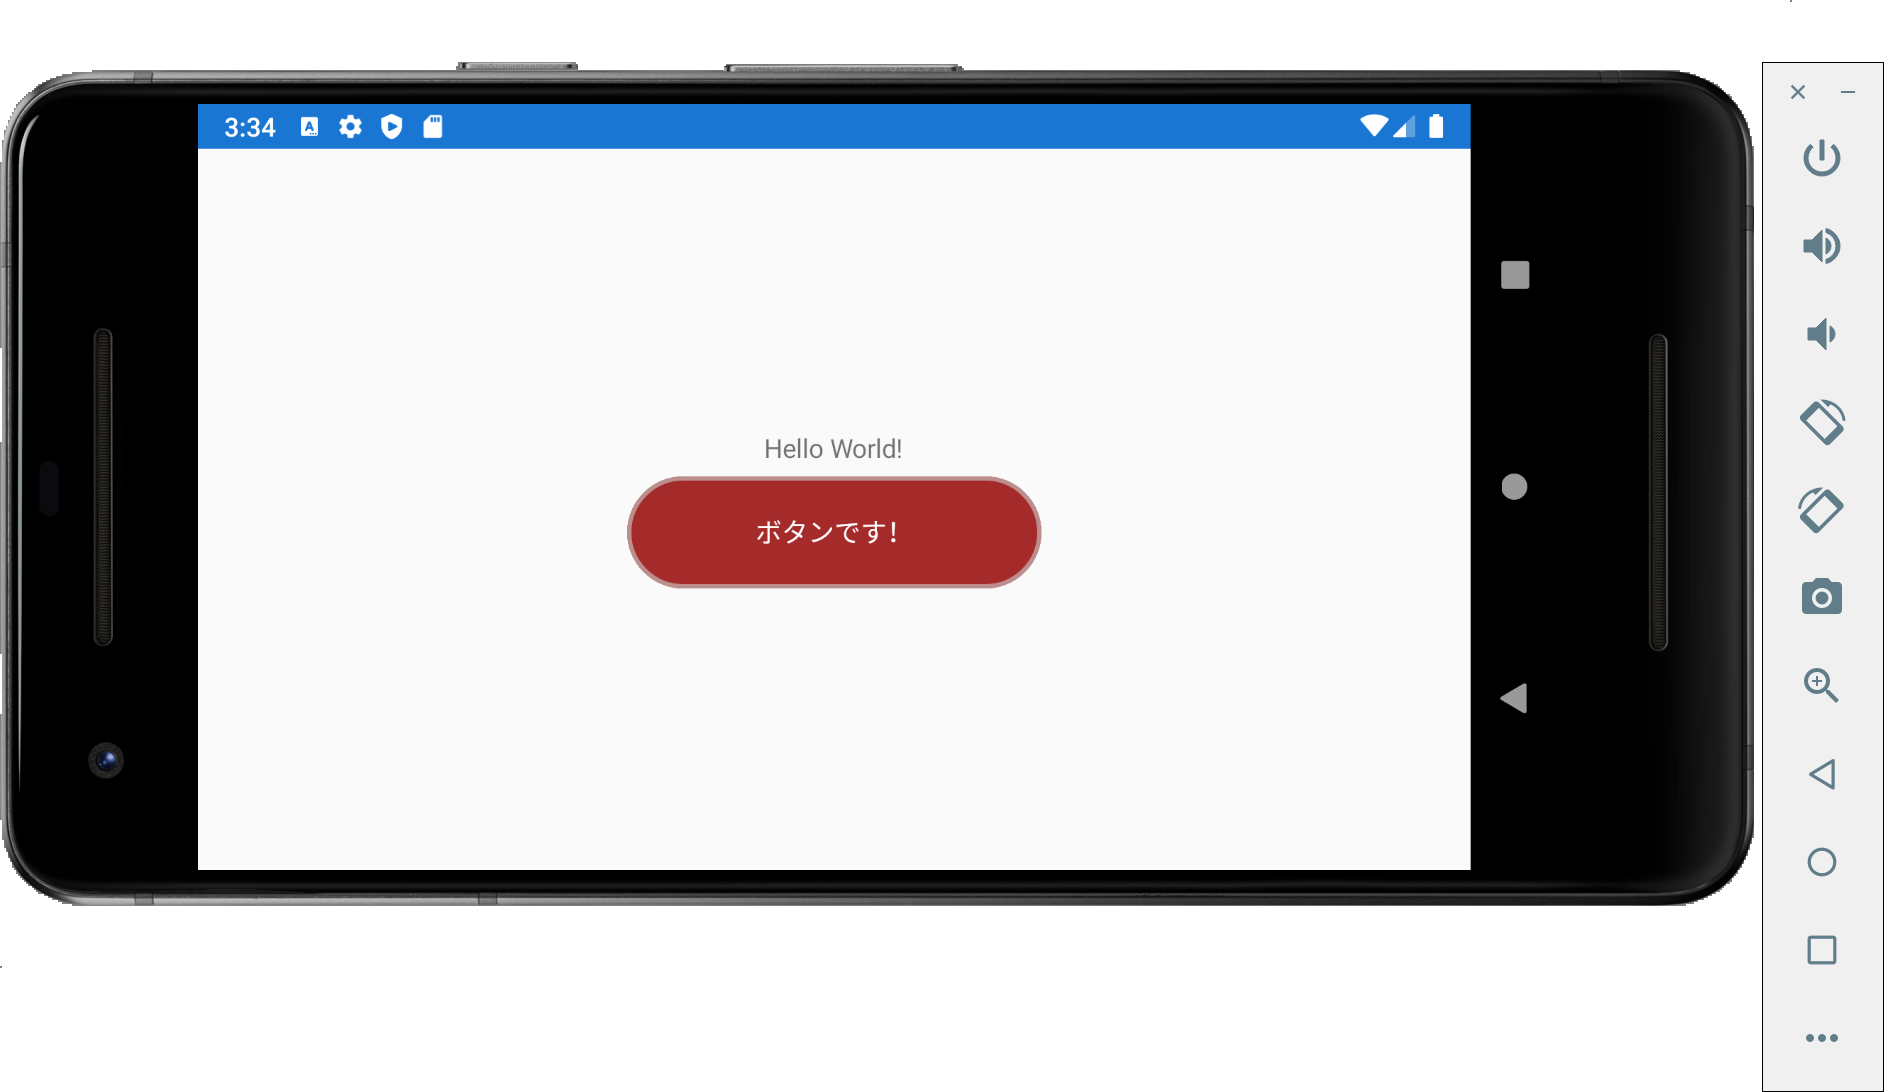
表示結果
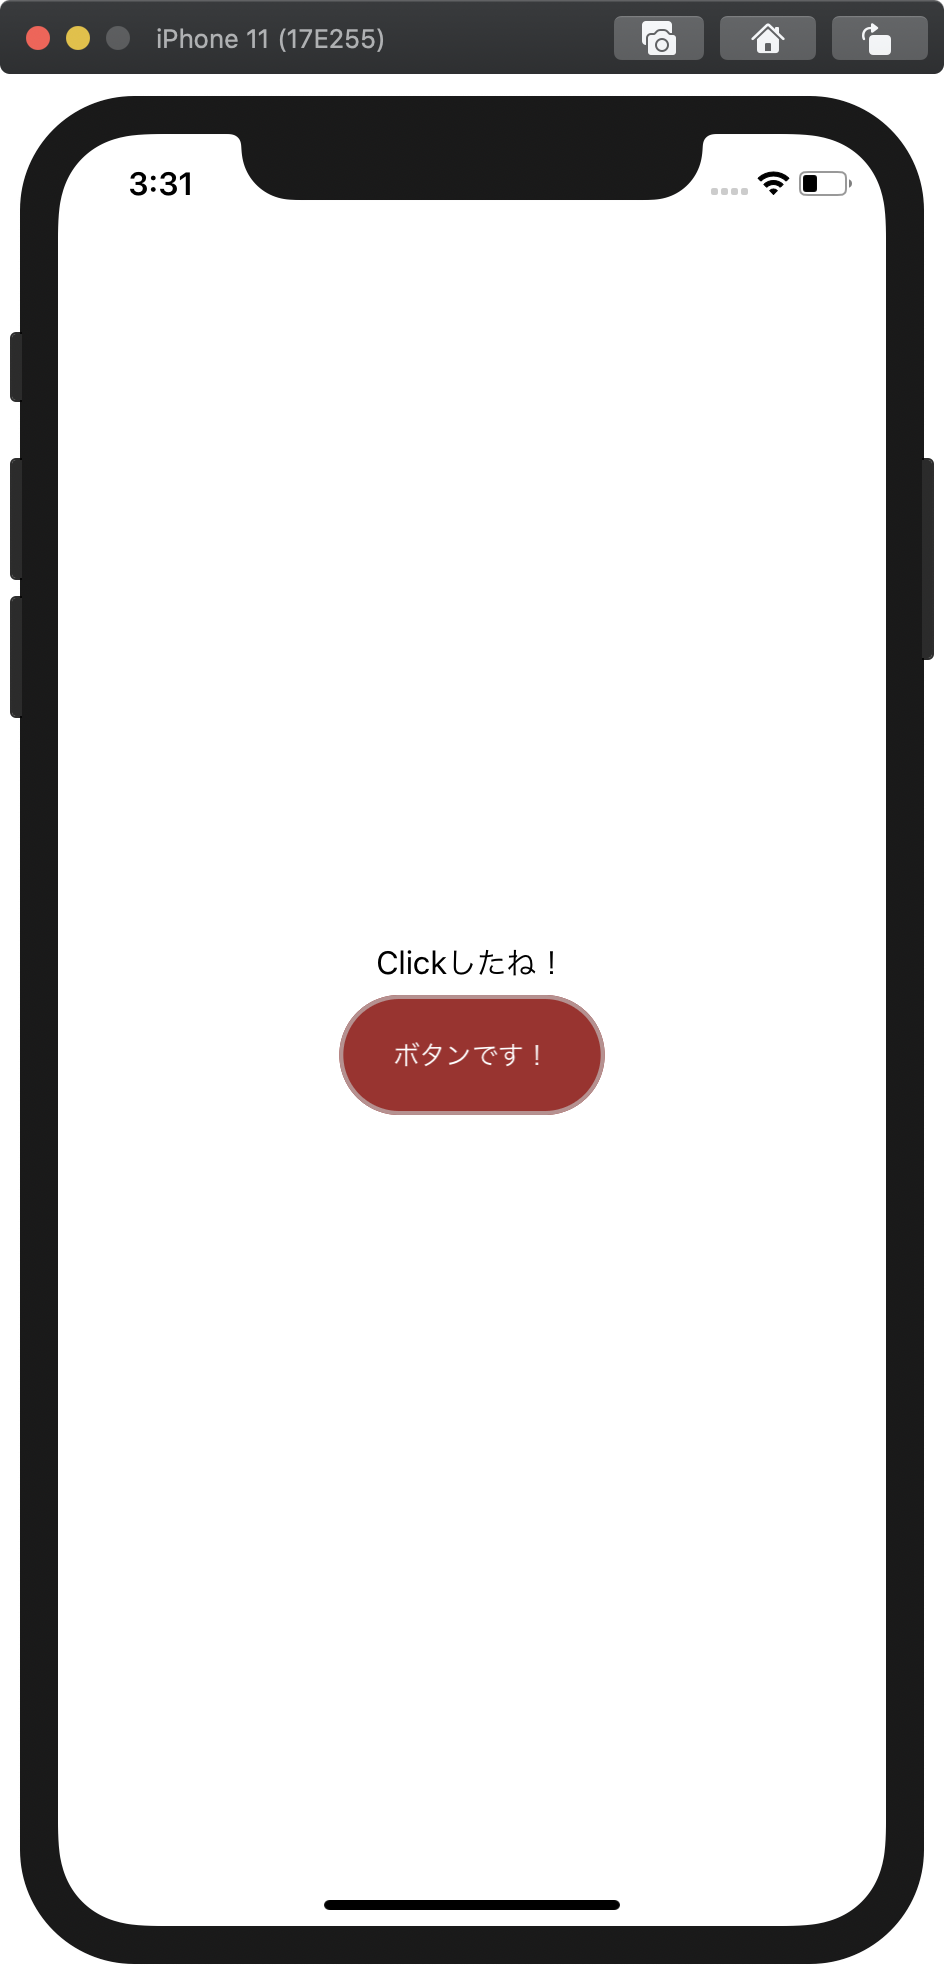
なかなかいい感じになりました。
ちょっと面倒と感じた方もいるかもしれませんが、画面を回転してもレイアウトが
保たれますし、androidでも同じように表示できるのはとても使いやすいです!
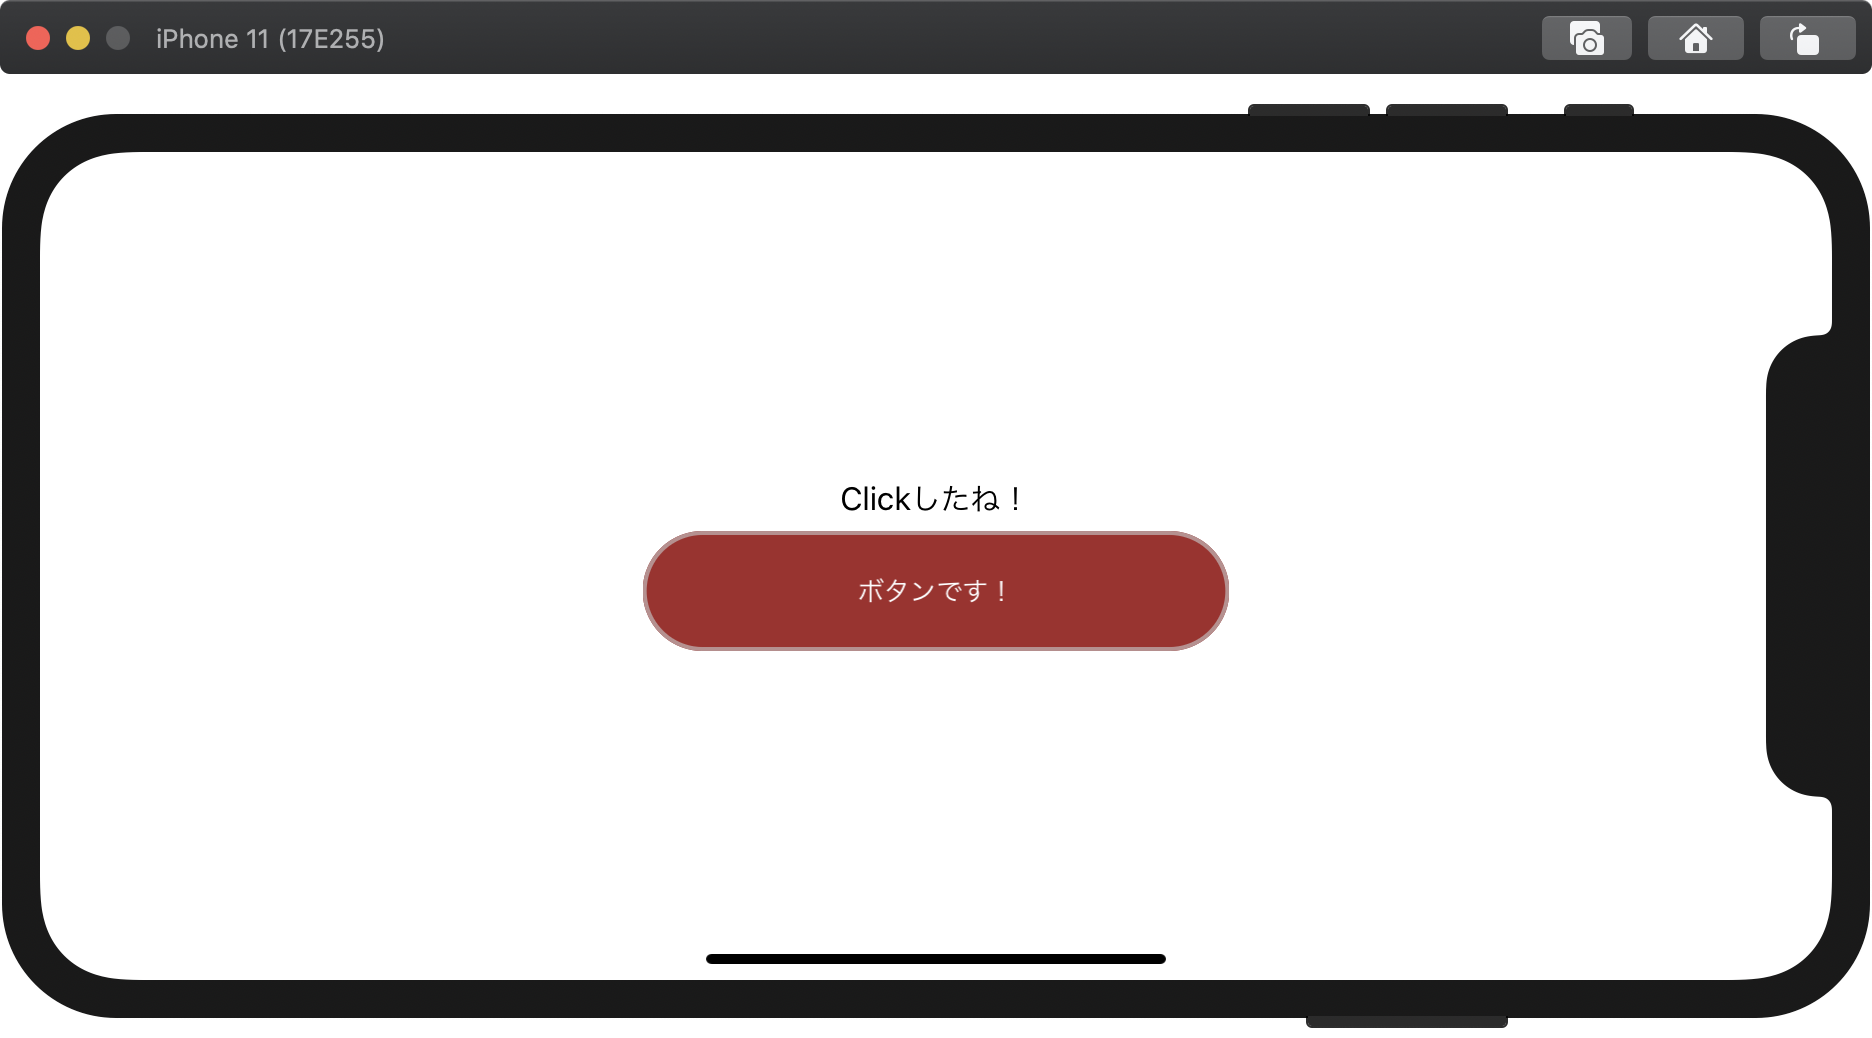
 今回はXamarin.Formでボタンへの機能の割り当てとxamlの利用方法を簡単に紹介いたしました。
ちょっと複雑ですが、iOS、androidの共通アプリが作成できるプラットフォームなので是非チャレンジしてみてください!


